Well i cant edit my old post so i thought i would start a new one with a updated guide on flashing a sprint iphone 4 to page plus. Its pretty much the same process with updated steps for ios6.
Well i posted recently that i acquired a iphone flashed to page plus. Well i didnt know it was a sprint iphone and thought it was a verizon one so i restored it and was left with no data. So i went on a mission and after many hours finally figured out the right combination of settings to get it working. So i thought i would share it with everyone on here because i cant find anywhere else how to do this other than paying someone large amounts of money which i dont have. But any on how to flash it.
You must have a sprint iphone 4. Clean esn or bad esn is ok. This will not work on a verizon iphone with bad esn. Will not work on any iphone 4s. Page plus does not except bad verizon esn. You need to be jail-broken and on ios5 or ios6. This should work on any ios 6 version.
You can activate any clean esn verizon iphone 4 or 4s without flashing, just call and add esn to account then program phone.
Onto Flashing:
Need to be jailbroken use red snow which is for mac and windows
Next add this repo into cydia
cydia.cdmaelite.com
Install ComCenter Patch and Install cricket carrier bundle from repo
Next you need to download the page plus bundle attached at the bottom of this post.
Then connect your iphone to your computer and use a file browser to open files installed on your iphone (I used diskaid).
Navigate too /system/Library/Carrier Bundles/Iphone/ and open the cricket bundle folder
Now erase everything inside and replace the contents with the page plus files
Reboot your phone and the new settings should be plugged into the phone.
Now we need to program the phone so open up the Dailer
dial ##626
then 000000
Then you input your MDN and MIN in the blanks
Then dial *228 and your phone will be programmed
now dial *22890 or *22800 or *22801 and select option 2 and that inputs the new prl.
Well you should be all set with everything working. Let me know how it goes (:
As we know the ios6 jailbreak is a tethered one, which means you have to boot up from a computer every time the device is shut off, well there is a way around this, if you dont mind losing the jailbreak
all it takes is a restore back to stock from itunes, the flash remains in the settings ( the only way to erase the flash is a network settings reset) to get data working you have to turn data roaming on
You are not actually roaming it thinks its on sprint and roaming on verizon but you actually arnt.
Well i hope it works for everyone and let me know if you need any help below and success feedback as well (:
Showing posts with label iphone 4 screen replacement. Show all posts
Showing posts with label iphone 4 screen replacement. Show all posts
Thursday, March 6, 2014
How to Update Iphone iphone 5s, iphone 5c, ipad air
1
Plug your iPhone into your computer .
.
.Open iTunes.
Click on the name of your iPhone.
Click "Check for Updates." If any firmware updates are available for your iPhone, an indication as such will appear on screen. If no updates are available, you will not be able to flash your iPhone at this time.
Click "Download and Install" on the "Updates Available" screen in iTunes. Do not attempt to use your iPhone during this process. Do not unplug your iPhone from your computer during this process. iTunes will download the necessary firmware updates to your computer's hard drive, at which point it will then flash your iPhone. Your existing iPhone firmware will be uninstalled and your new firmware will be put in its place. All of your personal files and data will then be synced back to the device once the flashing has taken place.
will then be synced back to the device once the flashing has taken place.something interesting iphone 5s, iphone 5c, ipad air
I have recently noticed that when performing the bypass method to get to the homescreen of your iphone (yes the one that everyone has seen a thousand times)
That at the point where you are to make a (No Name) contact and proceed to block this contact (in order to be pushed to the homescreen), you have the option to in fact airdrop the contact onto another Iphone so I curious about this went ahead and tryed it, and i successfully sent the (No Name) contact, from the (non-activated iphone 5 that is icloud locked) to another iphone (5s) (activated). Im not sure if this can be manipulated or not (as i am not very experienced).
Sunday, November 10, 2013
iPhone 5 Display Assembly Replacement
EditStep 1 — Front Panel Assembly
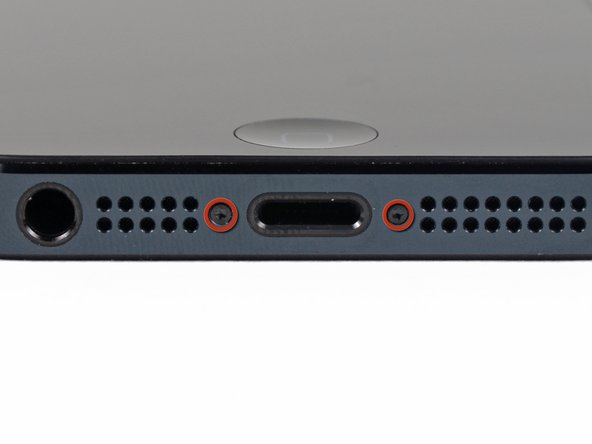
- Before disassembling your iPhone, be sure it is powered off.
- Remove the two 3.6 mm Pentalobe screws next to the Lightning connector.
EditStep 2
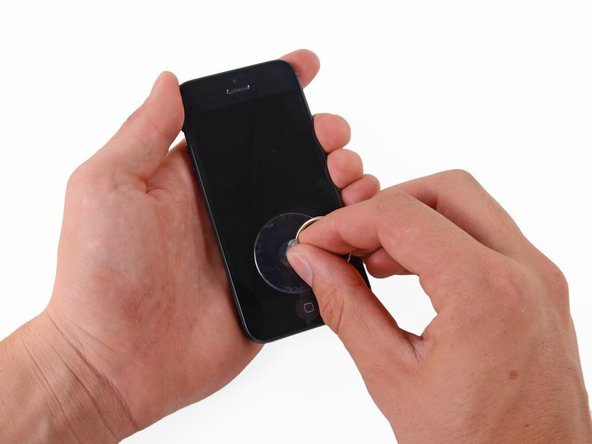
- Press a suction cup onto the screen, just above the home button.
- Be sure the cup is completely on the screen to get a tight seal.

EditStep 3
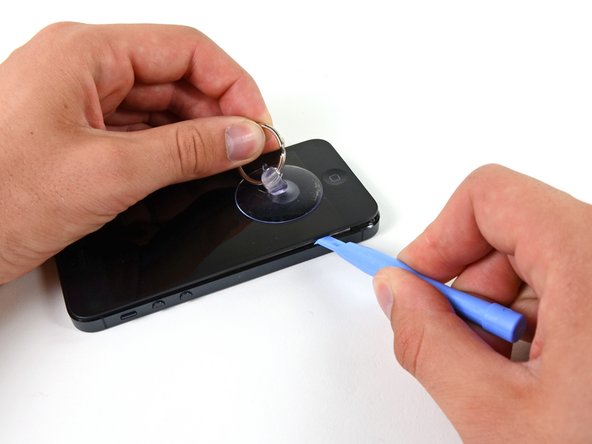
- Make sure the suction cup is firmly attached to the front panel assembly.
- While holding the iPhone down with one hand, pull up on the suction cup to slightly separate the front panel assembly from the rear case.
- Take your time and apply firm, constant force. The display assembly is a much tighter fit than most devices.
- With a plastic opening tool, begin to gently pry the rear case down, away from the display assembly, while you pull up with the suction cup.
- There are several clips attaching the front panel assembly to the rear case, so you may need to use a combination of the suction cup and plastic opening tool to free the front panel assembly.
EditStep 4
- Continue to pry up around the sides of the front panel assembly, detaching the clips along the left and right side.


EditStep 5
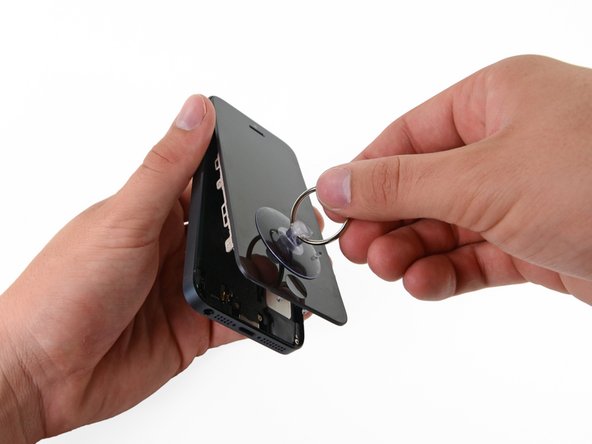
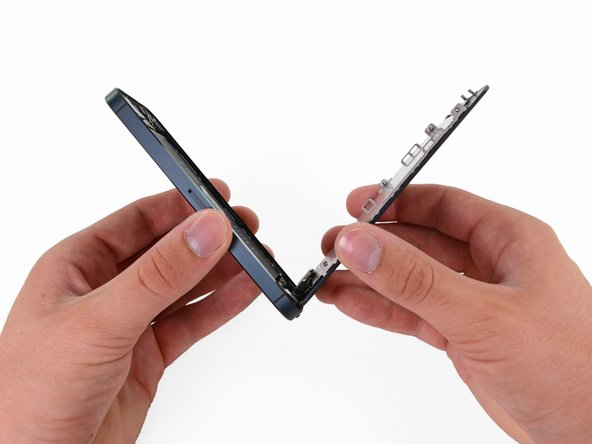
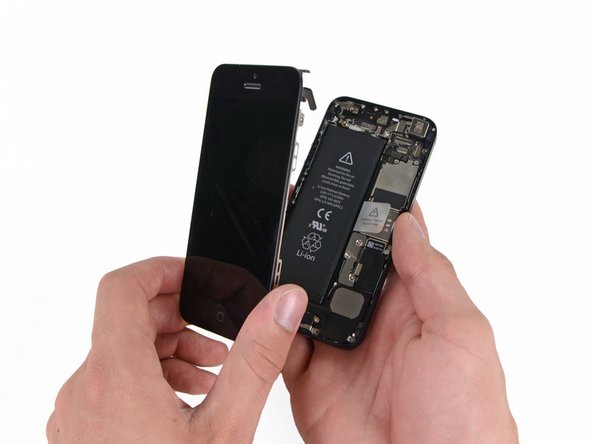
- Do not try to completely remove the front panel assembly from the rear case, as there are several ribbon cables still attached at the top of the iPhone.
- Once the clips have been released on the bottom and sides of the front panel assembly, pull the bottom of the assembly away from the rear case.
- Lift and rotate the front panel assembly up to about 90 degrees from the rear case.
EditStep 6
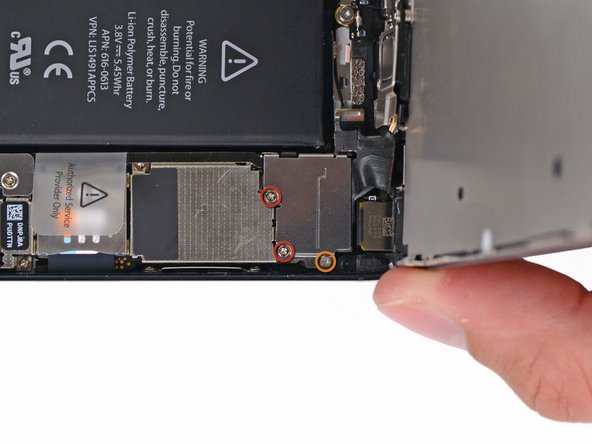
- Remove the following screws securing the front panel assembly cable bracket to the logic board:
- Two 1.2 mm Phillips screws
- One 1.6 mm Phillips screw


EditStep 8
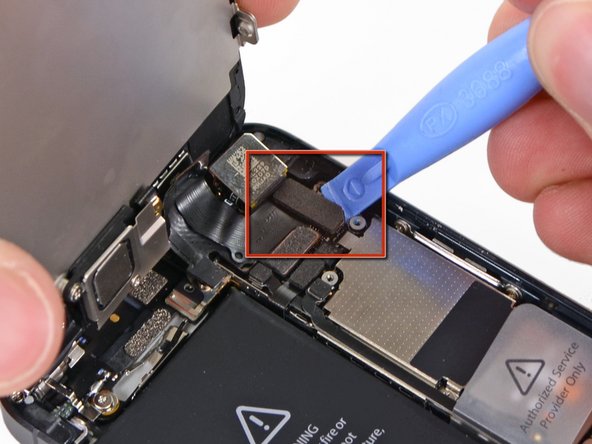
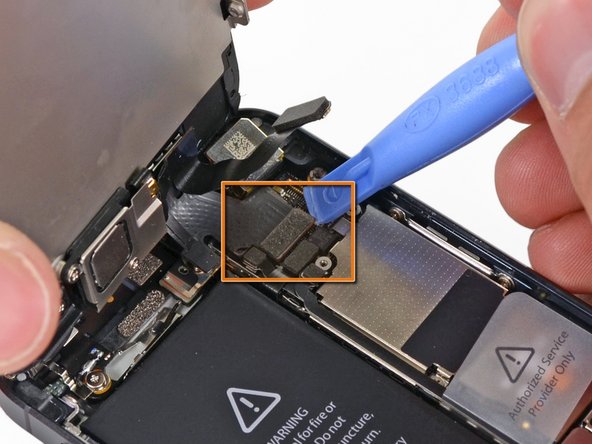
- Use a plastic opening tool to disconnect the three front panel assembly cables:
- Front-facing camera and sensor cable
- Digitizer cable
- LCD cable
- When reassembling your phone, The LCD cable may pop off the connector. This can cause white lines, or nothing at all to appear when powering your phone back on. If that happens, simply reconnect the cable and power cycle your phone. The best way to power cycle your phone is to disconnect and reconnect the battery.
EditStep 9
- Remove the front panel assembly from the rear case.

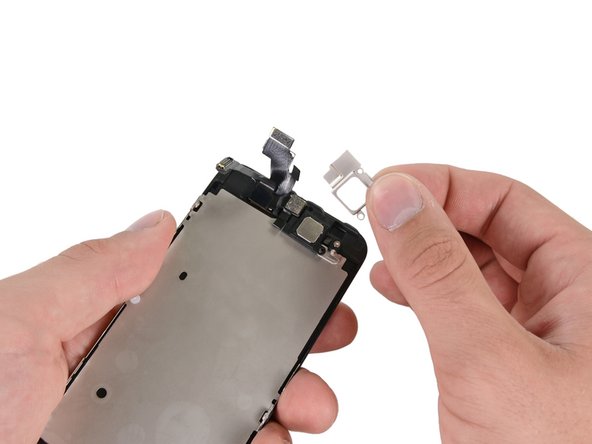
EditStep 10 — Earpiece Speaker
- Remove two screws securing the front-facing camera bracket to the display assembly.
- One 4.1 mm Phillips screw
- One 2.2 mm Phillips screw


EditStep 12
- Remove the earpiece speaker from the iPhone.

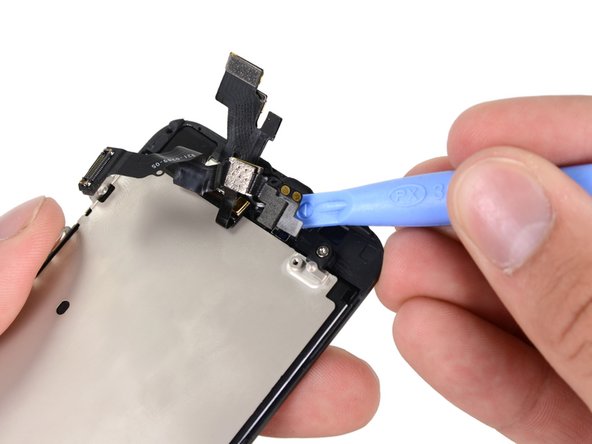


EditStep 13 — Front-Facing Camera and Sensor Cable
- Starting under the earpiece speaker contacts, use a plastic opening tool or the tip of a spudger to pry the front facing camera cable out of the display assembly.

EditStep 14
- Remove the front-facing camera and rear microphone assembly.

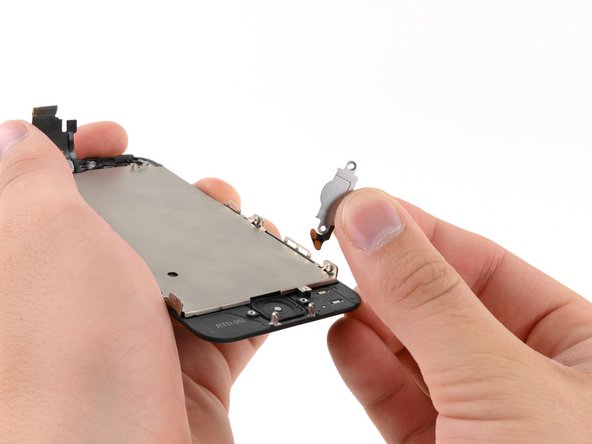
EditStep 15 — Home Button Ribbon Cable
- Remove the two 1.3 mm Phillips screws securing the home button bracket to the display assembly.

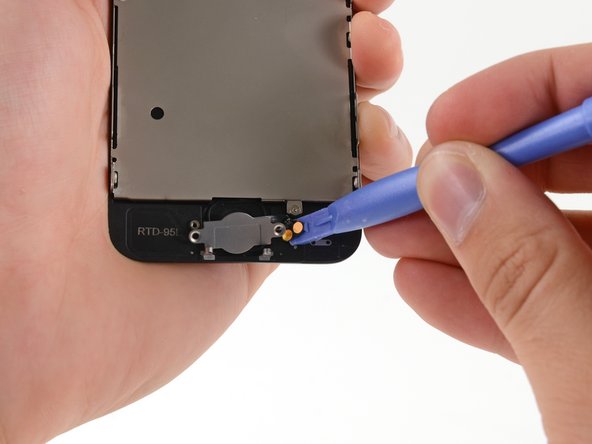


EditStep 16
- Use a plastic opening tool to pry the edge of the home button ribbon cable up from the display assembly.
- Start under the contact points on the right and work to the left.
- Going left to right may rip your ribbon cable as the contacts are well adhered to the front panel.
- If you have trouble sliding the plastic opening tool under the contact points, flip the tool over and gently push against the right side of the contacts to loosen the adhesive, then try again.
EditStep 17
- Remove the home button ribbon cable from the display assembly.

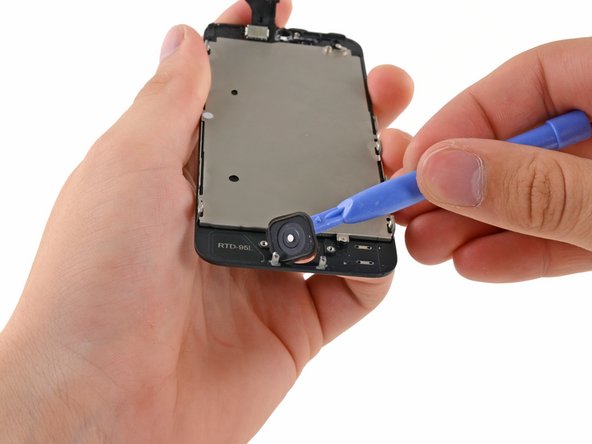


EditStep 18 — Display Assembly
- Use a plastic opening tool to pry the home button up from the display assembly.

EditStep 19
- Remove the home button from the display assembly.

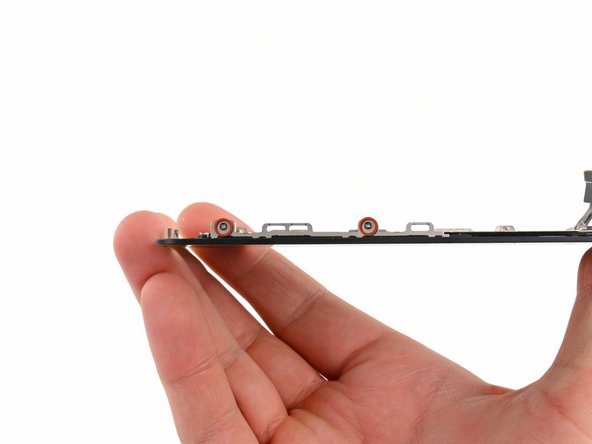


EditStep 21
- Remove the two screws securing the LCD shield plate to the display assembly:
- One 1.4 mm Phillips screw
- One 2.6 mm Phillips screw

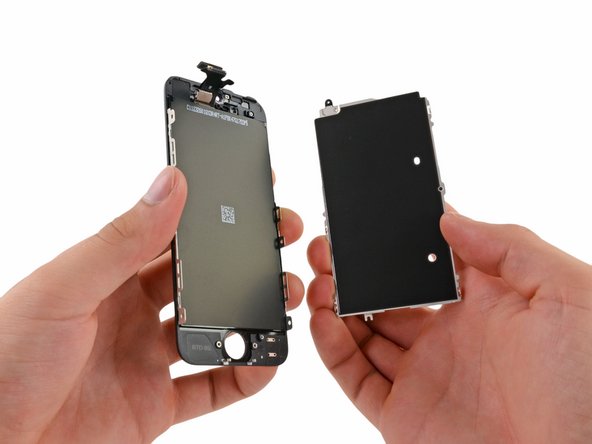


EditStep 23
- The bare display assembly remains.
- For reassembly, make sure to transfer over the LCD shield, home button, front facing camera assembly, front facing camera lens bezel and earpiece speaker to your new part.
- Make sure the remove the protective cover from your new display assembly.
Subscribe to:
Posts (Atom)