Showing posts with label android rooting. Show all posts

Sunday, June 22, 2014

Geohot “makes it ra1n” on Android with a rooting tool for the Samsung Galaxy S5

Towelroot Make it Ra1n
Geohot—a name that’s virtually synonymous with iPhone jailbreaking—has taken up quite a few different ventures since departing from the jailbreak scene.
He’s dabbled inPlaystation 3 hacking, and working at Facebook. He was even rumored to have been on the precipice of an iOS 7 jailbreak, but nothing formally materialized from him.

Friday, March 21, 2014

How to Root Samsung Galaxy S4′s new 4.4.2 Custom Rom


How to Root Samsung Galaxy S4′s new 4.4.2 Custom Rom

All you have to do is follow the simple guide below to make sure you get a successful rooting.First  make sure that you have all the Samsung USB drivers installed on your PC. These steps are recommended only for I9505 device. Also, I am not responsible whatever happens to your device by the use of this method.To continue, follow these steps:
Step 1: Download Odin on your PC which you need to run on the PC to flash the rooting file.
Step 2: Download the CF Auto Root Package for Android 4.4.2 and extract its file to your PC’s desktop.
Step 3: Now grab your phone, Power it off and press Vol Down+Home+Power buttons till you see the green Android robot. Press the power button again to enter into Download mode.
Step 4: Now run Odin on your PC which you have downloaded in Step 1 and connect your phone to your PC via the USB cable.
Note: Your phone must be in download mode when you connect it with your PC
Step 5: After you have connected your phone, one of the ID:COM devices will turn yellow and your phone’s COM/Port will appear on it. Now click on ‘PDA’ and choose the file ‘CF-Auto-Root-jflte-jfltexx-gti9505.zip’ from your desktop. Also make sure that ‘Auto Reboot’ and ‘F. Reset’ options are checked.
Step 6: Click on the Start Button. The installation will start from Odin and when it is complete your phone will start the process by moving into recovery and the ID:COM box will turn green.
Step 7: After you see the home screen, please remove your phone from your PC. Hurray!! you have rooted!!! :)
Any questions/ideas?? Please comment below..

Sunday, March 16, 2014

How to Root the Samsung Galaxy S4 ( Download links )


How to Root Your Nexus, HTC One, or Samsung Galaxy S4

How to Root the Samsung Galaxy S4

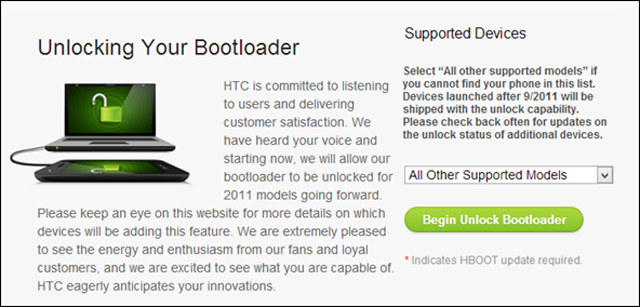
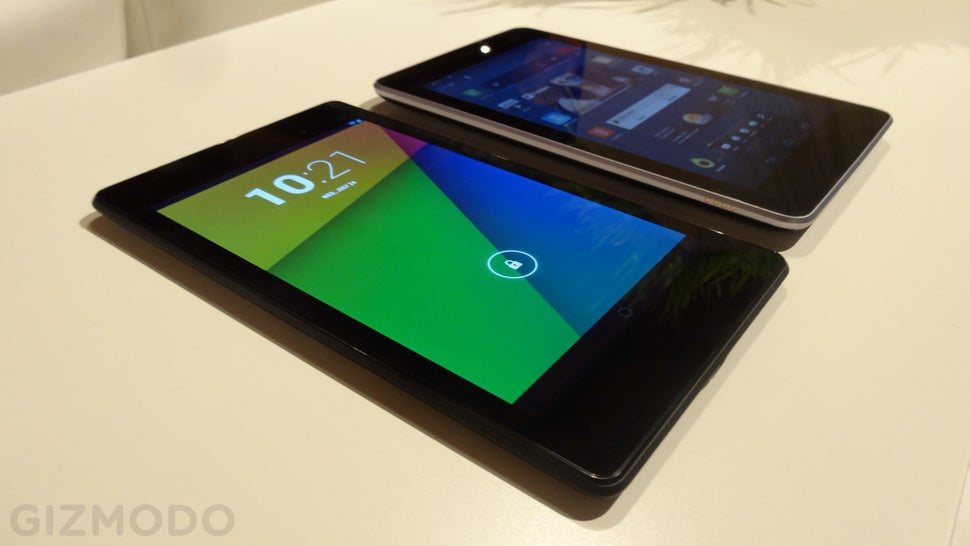
The Galaxy S4 is an interesting device as it’s simultaneously easier and more difficult to root. Unlike the HTC and Nexus devices, Samsung doesn’t offer an official bootloader unlock system for the carrier-locked phones. These are the overwhelming majority of GS4s, so that’s what we’re going over here.
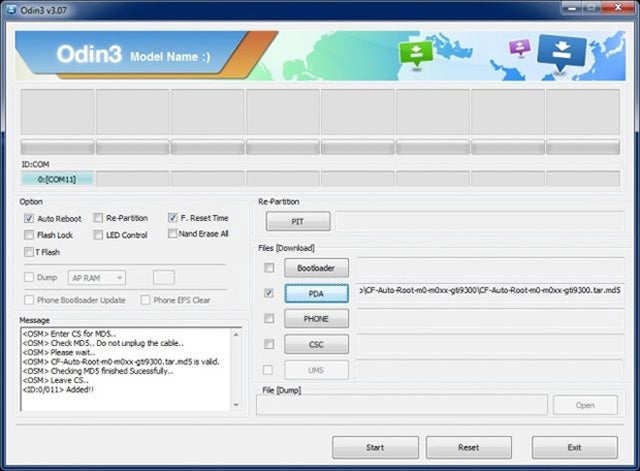
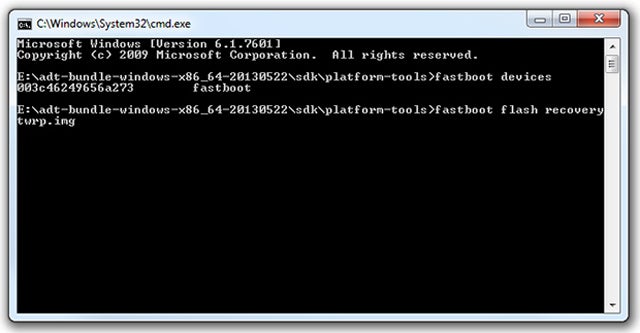
Some carriers have more bootloader security than others, and just like the previously detailed phones, we need to get around that. Instead of using ADB, we need a tool called ODIN, which allows efficient communication with Samsung devices over a PC connection.
1 - Install ODIN and run it. Click on the PDA button.
How to Root Your Nexus, HTC One, or Samsung Galaxy S4SEXPAND
2 - ODIN will ask you to select the root file, which it came with.
3 - On your phone, power it completely off, then hold power and volume up to enter download mode.
4 - Connect the Galaxy S4 to the PC and click the Start button in ODIN.
5 - ODIN will churn for a moment and tell if your phone is supported for automatic root. Most are, and it will push the file over. Once you’ve seen the SuperUser Android logo, you've got root installed.
6 - Reboot the phone, and you’re (hopefully) done.
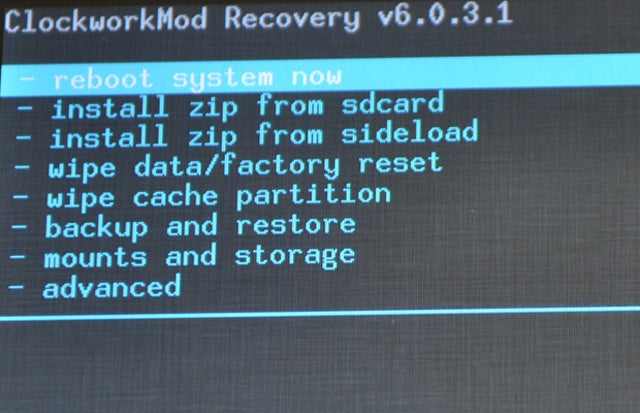
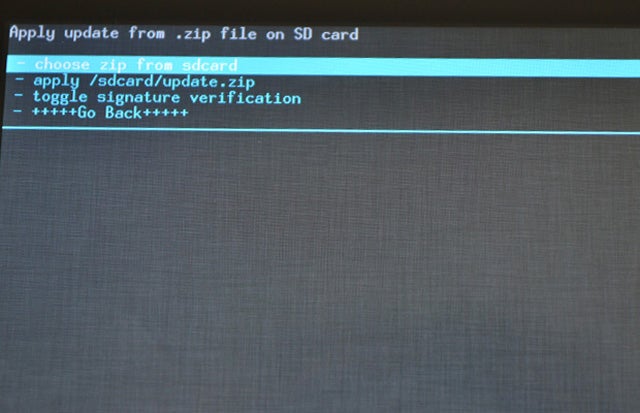
Note: None of this replaced the recovery or unlocked the bootloader. The device is still more restricted than other rooted Android phones. A different method that replaces the recovery will give you more control and helps get around some of the roadblocks that stop ODIN from running the process automatically.
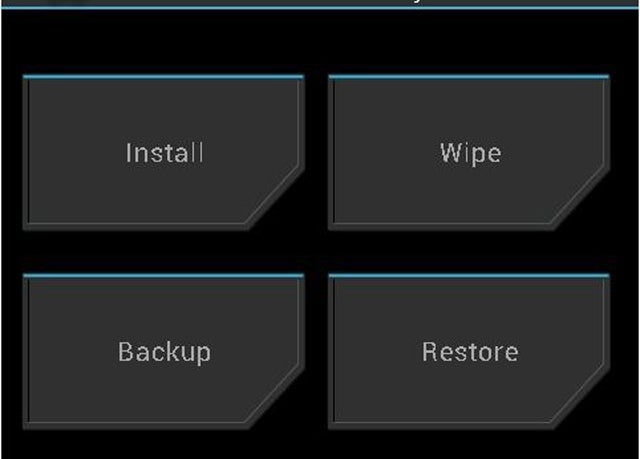
The process is the same as above, except you will point ODIN toward ClockWorkMod recovery, which you can find over here. Then use ClockWorkMod to flash the SuperUser zip (reboot with power, volume down, and home pressed). Depending on your model, you may need to use the Loki tool instead of ODIN. A quick search on XDA will tell you which version of the device needs which tool.
How to Root Your Nexus, HTC One, or Samsung Galaxy S4SEXPAND
Samsung changes the security settings frequently, but as long as you know which version of the phone you have, you can probably gain root. Just remember: i9500 is the international variant, and i9505 is the Snapdragon US version. Carrier locked models have their own models sometimes, like the SCH-i545 for Verizon. There are a few versions of GS4 software that don’t have active roots yet, so you may have to be patient.
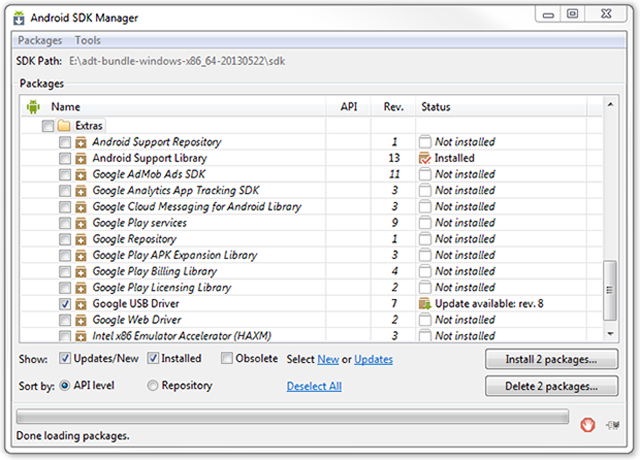
For other devices, you’re going to be doing the same basic things outlined above, or some variation of them. Check XDA for the most up-to-date root files for your device, and get ADB ready. Most devices don’t have encrypted bootloaders, so it’s easy to get a custom recovery installed. From there, it’s clear sailing.

How to Root the HTC One step by step ( download links


How to Root the HTC One

The new HTC flagship device is pretty hot right now, and it serves as an interesting middle ground between a Nexus-style root, and the more hackery ones. Like the Nexus, we need to unlock the bootloader, but it’s encrypted on this phone. To unlock, you need to register as an HTC developer on the HTC Dev site (it’s free).
Just like above, you’ll need the Android SDK, USB drivers, and fastboot drivers. Installing the HTC Sync Manager will get you the drivers you need, but the HTC Dev site will provide you with Fastboot and a few other files. Backup the phone, as unlocking the bootloader will reset everything.
How to Root Your Nexus, HTC One, or Samsung Galaxy S4SEXPAND
1 - Go to the HTC Dev site and follow the instructions to get into bootloader mode. You will disconnect the device from PC, turn it off, press and hold Volume Down and the Power button to access the Bootloader.
2 - Use the volume keys to select fastboot mode, and select it with power. When the device does its thing, connect it to the PC again.
3 - On your PC, go to the folder with all the ADB and Fastboot files and open a command prompt. Type fastboot devices and hit enter. The HTC One should show up as a device ID.
4 - Enter fastboot oem get_identifier_token. This will spit out a big block of text, which you will then copy and paste into the HTC Dev site when it asks for it. Wait a bit, and HTC will send you the unlock token. Place it in the Fastboot folder.
How to Root Your Nexus, HTC One, or Samsung Galaxy S4SEXPAND
5 - With the HTC One still in Fastboot mode, type fastboot flash unlocktoken Unlock_code.bin. Now you’re unlocked, so it’s time to root. Reboot the phone normally and download the SuperUser zip file from Koush. Transfer it to the device.
6 - Download TWRP recovery for the HTC One and place it in the directory with your Fastboot and ADB files.
7 - Open another command prompt and get your device back into Fastboot mode just like above. Type fastboot flash recovery twrp.img and hit enter.
How to Root Your Nexus, HTC One, or Samsung Galaxy S4SEXPAND
8 - Turn off the HTC One and turn it on in Bootloader mode by holding the Volume Down + Power button. Select Recovery and wait for the device to load.
How to Root Your Nexus, HTC One, or Samsung Galaxy S4SEXPAND
9 - In Recovery, go to install and select the SuperUser zip. The zip will flash, and that’s it. You’re rooted.

How to Root Your Nexus, HTC One, or Samsung Galaxy S4

How to Root the Nexus Step by step ( Download Link )


How to Root Your Nexus, HTC One, or Samsung Galaxy S4SEXPAND

How to Root the Nexus

1 - Download and install the Android SDK from Google and install the USB drivers package and Android tools.
2 - If it is not present, download the fastboot.exe file (available on various places online, like here) and place it in the SDK/Tools (or Platform-Tools) folder. This will be the same folder with adb.exe in it.
How to Root Your Nexus, HTC One, or Samsung Galaxy S4SEXPAND
3 - On your phone or tablet, go into the settings and open the About Phone/Tablet menu. Tap the Build Number seven times. This will enable Developer Options in the main settings menu.
How to Root Your Nexus, HTC One, or Samsung Galaxy S4SEXPAND
4 - Turn on USB Debugging in the Developer Options, and plug the device into your PC via the USB cable.
5 - Back on the PC, go to the folder where you placed the fastboot.exe file and open a command prompt window there. We’re going to use a tool called Android Debug Bridge (ADB). This is a way to issue commands to a device from your PC.
6 - In the command prompt, type adb devices, then hit enter. The window should show a device ID.
7 - Type adb reboot bootloader in the command prompt and hit enter. Your device will reboot into bootloader mode.
How to Root Your Nexus, HTC One, or Samsung Galaxy S4SEXPAND
8 - Now type fastboot oem unlock and hit enter. The device will pop up a warning as seen below. Select yes, but be aware this is the step that wipes the phone or tablet.
How to Root Your Nexus, HTC One, or Samsung Galaxy S4SEXPAND
9 - On your PC download the TWRP recovery or ClockWorkMod (varies by device) andSuperSUroot package. The versions change as new OS updates come out, but a quick search onXDA will get you the most recent version. Put the recovery file in the folder with ADB. Get your device back into Android and transfer the SuperSU zip to the internal storage.
10 - With your phone or tablet in bootloader mode again, type the following into the command prompt: fastboot flash recovery twrp.img, then hit enter. Substitute the MWN file name if you used that. This installs a new recovery over your old one so you can flash unsigned zip files.
How to Root Your Nexus, HTC One, or Samsung Galaxy S4SEXPAND
11 - Finally, disconnect the device from your PC and use the volume rocker to navigate through the list of options in the bootloader. Choose the Recovery option and select it using the power button. Once in the recovery, find the option to Install a zip from the SD card, then select the SuperSU zip. And that’s it. You’re rooted.
How to Root Your Nexus, HTC One, or Samsung Galaxy S4SEXPAND
A word about the toolkits: This is a separate program that can be used to automate the process above. It’s best that you know how to use ADB anyway, so we recommend that route. Sometimes things go wrong, and ADB might be the best way to fix it. However, you are welcome to try theNexus Root Toolkit from WugFresh. It’s the best one by far.
How to Root Your Nexus, HTC One, or Samsung Galaxy S4SEXPAND
Just plug in the device, click Unlock, wait, click Root, wait some more, and you’re done. If something goes wrong, it’s not easy to figure out exactly what it was.

Friday, March 7, 2014

How to Root the Samsung Galaxy S4 ( with pictures )

How to Root the Samsung Galaxy S4


Screen Shot 2013-08-27 at 1.10.53 PM
Need to remove some of the bloatware on your Samsung Galaxy S4? Want to edit whatapplications can be used with the device’s multi window feature? All of this is possible and more if you root  your phone. Rooting is the process of gaining  administrative or “root” access to your device, which gives you access to all the directories, commands, and subsystems. Interested? Here’s how to gain root access on the Samsung Galaxy S4.
1. Download and install Samsung’s USB Drivers.
Screen Shot 2013-08-26 at 1.48.23 PM
2. Pull down the notification bar and tap the Settings icon.
Screen Shot 2013-08-26 at 7.00.21 PM
3. Tap More > About Device.
Screen Shot 2013-08-26 at 7.01.27 PM 
4. Tap Build Number repeatedly until the device pops up a notification saying “You are now aDeveloper”.
Screen Shot 2013-08-26 at 7.01.31 PM
5. Go back and tap on Developer Options.
Screen Shot 2013-08-26 at 7.01.38 PM 
6. Turn USB Debugging on.
Screen Shot 2013-08-26 at 7.01.45 PM
7. Plug your device in via USB cable and wait for the drivers to install.
8. Download the Motochopper program to your desktop.
Motochopper (the download is in the first post in the thread)
Screen Shot 2013-08-26 at 7.04.58 PM
9. Extract the .zip file to your desktop.
Screen Shot 2013-08-26 at 7.05.12 PM
10a. Double click the run.bat file inside the the newly extracted folder if on Windows.
Screen Shot 2013-08-26 at 7.05.24 PM
10b. If on a mac, open Terminal (inside Applications > Utilities) and then type the following into Terminal with hitting enter at the end of each line:
cd desktop
cd motochopper
./run.sh
Screen Shot 2013-08-26 at 7.05.52 PM
11. Select OK on the device when prompted.
Screen Shot 2013-08-26 at 7.08.50 PM
12. Once it’s all done, check for SuperSU in your applications drawer. If it’s there, you’re all set.

Screen Shot 2013-08-26 at 7.10.40 PM